Custom magnetic
adapter
OPTIONAL
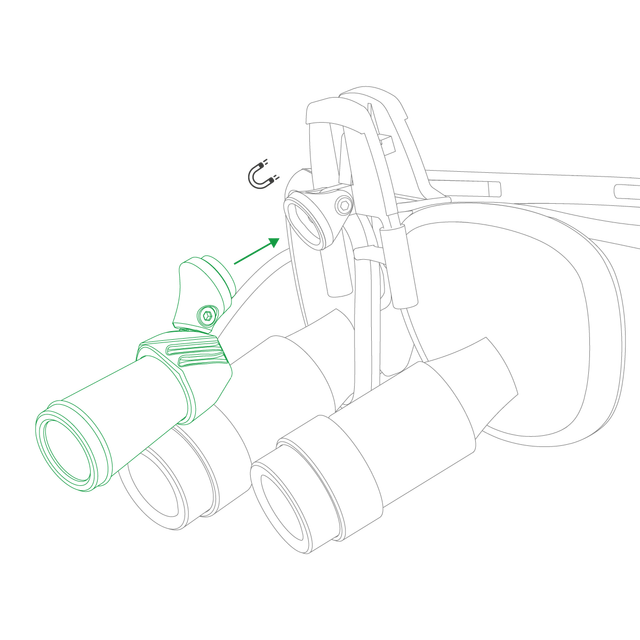
The magnetic adapter, specific for each loupes model, allows a quick and comfortable fixing of the headlight.
Loupes and light become an integrated system.
Hook the batteries to the charger. Connect the charger to the power supply via the USB cable. Connect the power supply to the adapter suitable for your power socket.
The charger is equipped with two slots for simultaneous charging of the two batteries included in the package. (The charging time of 90 minutes remains unchanged whether 1 or 2 batteries are connected to the charger).
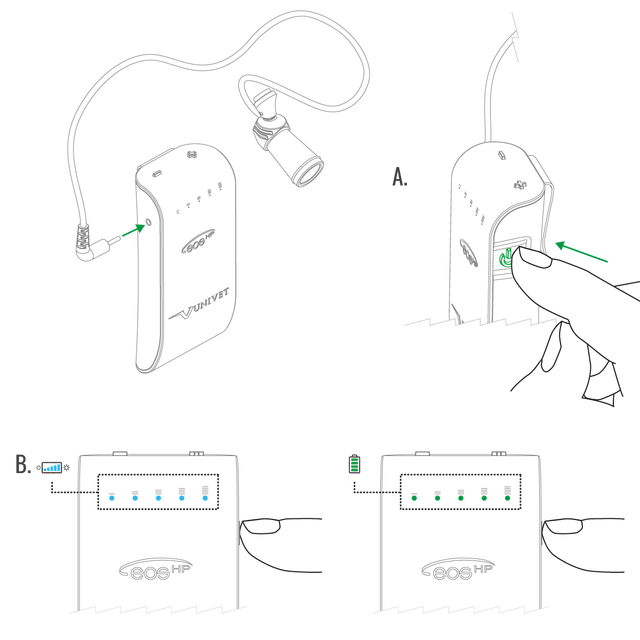
While charging, the charge status indicators flash (A) and all remain lit when fully charged (B).

Once the battery is attached to the LED, the charge indicators will light up for 4 seconds indicating the charge level.

To view the charge status, see points 3. and 6. of this section.
(ATTENTION: the charge status signal remains active for 4 seconds).


Hook the batteries to the charger. Connect the charger to the power supply via the USB cable. Connect the power supply to the adapter suitable for your power socket.
The charger is equipped with two slots for simultaneous charging of the two batteries included in the package. (The charging time of 90 minutes remains unchanged whether 1 or 2 batteries are connected to the charger).
While charging, the charge status indicators flash (A) and all remain lit when fully charged (B).
Open the clip of the adapter (included in the package) and place it over the nose bridge of the loupe.

After attaching the adapter to the magnifying system, hook the LED to the adapter using the magnet, making sure that the two interlocking parts match.

To avoid hindrances caused by the LED cable during its use, we recommend you fasten it through the cable glands to the frame of your loupes.

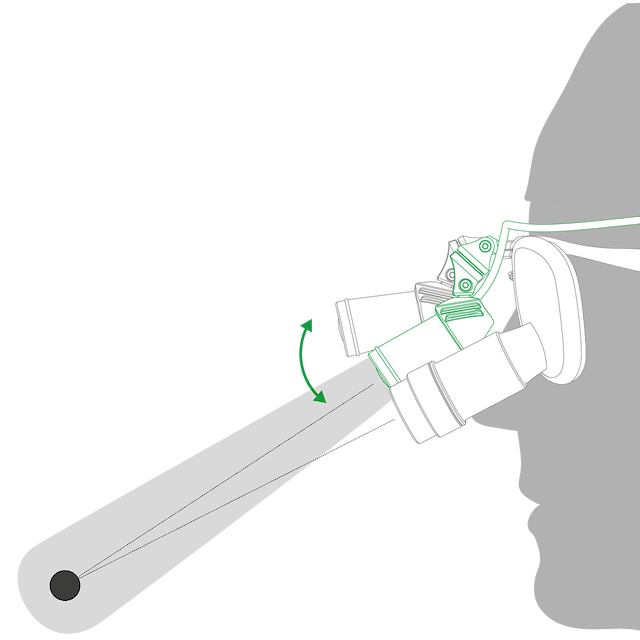
It is advisable to adjust the inclination of the LED so that the spot light illuminates the desired field of view.

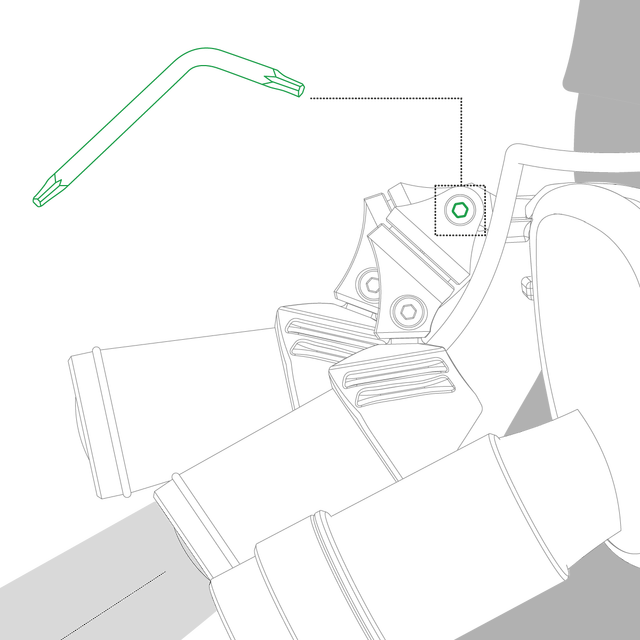
Once the correct position of the spot has been established, it is then suggested to tighten the magnetic bell screw using the Allen key (included in the package).


While using light pressure, hook the UV filter (included in the package) on the front of the LED.