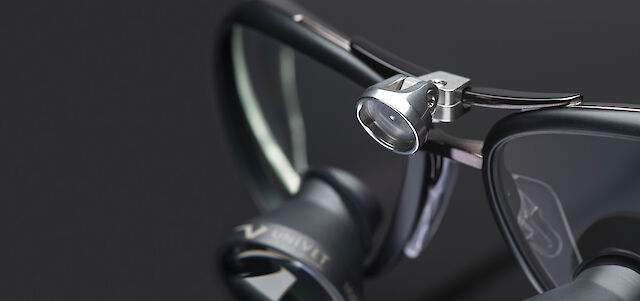
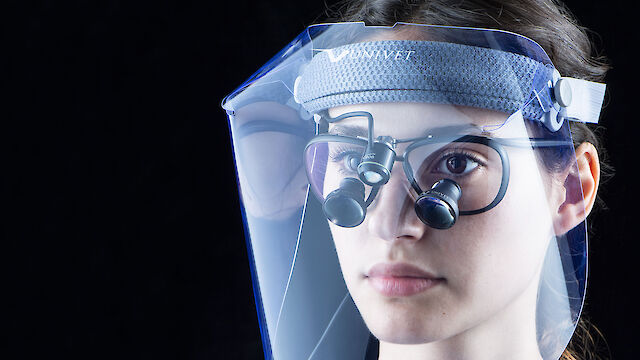
EOS 2.0

User guide

Package Contents

01.  CONTROL UNIT


02.  LED


03. BATTERY CHARGER

04. UNIVERSAL CLIP ON 

05. BELT CLIP

06. UV FILTER

07.  SCREWDRIVER


08.  SPIRAL WRAPPING BAND


09.  POWER OUTLET ADAPTER KIT

10. USB CABLE

 CAUTION 
 

When using the EOS 2.0 for the first time, we recommend that you first recharge the control unit included in the packag

CAUTION
 

When using the EOS 2.0 for the first time, we recommend that you recharge the control unit included in the package.

01.

CONTROL UNIT RECHARGE

CHARGING TIME: 4 HOURS

In order to recharge the control unit it will be necessary to insert the jack plug of the USB cable into the appropriate side hole. Then attach the adapter suitable for your power socket to the charger.

While charging, the charge status indicator, located on the front of the control unit, will remain lit in red (A) and will turn green when fully charged (B).

02.

BATTERY CHARGE STATUS INDICATION

BY CONNECTING IT TO THE LED

Once the LED is connected to the control unit, press and hold the power button to activate the illuminator (A). The indicators placed on the front will light up with the colours of the Italian flag for 3 seconds, indicating that the device has been activated and then will stabilise, turning green, showing the level of light intensity of the LED (B).

03.

KEY TO THE BATTERY CHARGE STATUS

BATTERY CHARGE LEVELS

The charge status of the control unit is always visible when using the device thanks to the indicator placed on the front.

The indicator appears off if the device is charged, according to a percentage between 100% and 11%.

Between 10% and 6% charge, the indicator will glow solid orange.

Below a 5% charge, the orange indicator will start flashing warning the user that the device is running low.

ATTENTION

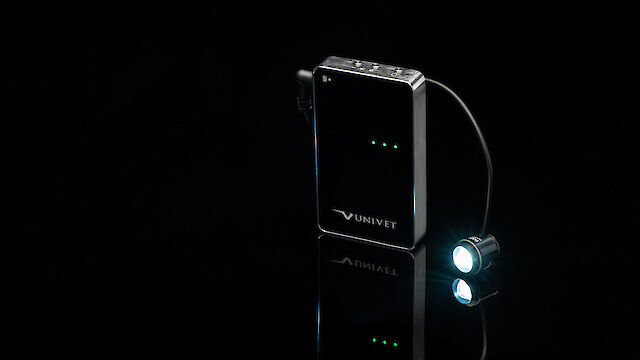
If the illuminator is switched on without having connected the LED headlight to the control unit, the front indicators will light up red indicating an error. We therefore advise you to follow the instructions in the above order for a correct operation of the device itself.

LED LIGHT INTENSITY

LIGHT INTENSITY LEVELS

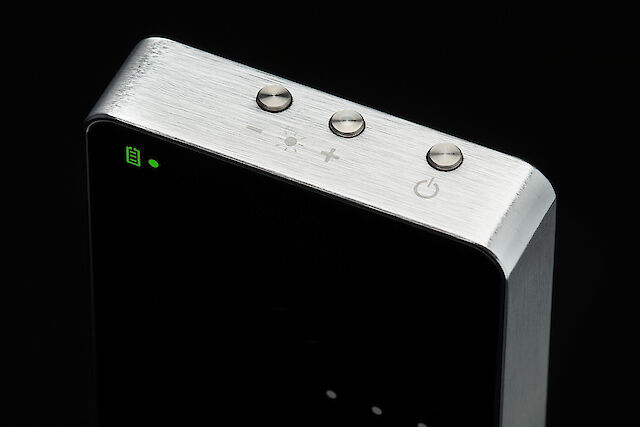
The light emitted by the LED headlight is adjustable according to 3 levels of intensity thanks to the minus (-) and plus (+) keys located in the upper part of the control unit.

Each time the minus (-) key is clicked, the light intensity level will gradually decrease to a minimum of 1 (A).

On the contrary, with each click of the plus (+) key, the brightness level will gradually increase up to a maximum of 3 (B).

Each time it is switched on, the maximum light intensity will be suggested (level 3).

ATTACHMENT TO THE MAGNIFYING SYSTEM
 

Only connect the device to the magnifying system after connecting the battery to the LED.

01.

CONNECTION WITH
THE UNIVERSAL ADAPTER

Open the clip of the adapter (included in the package) and place it over the nose bridge of the loupes.

02.

LED HEADLIGHT FASTENING
TO THE UNIVERSAL OR CUSTOM ADAPTER

After attaching the adapter to the loupes, attach the LED headlight to the adapter using the magnet.

03.

USE OF THE
CABLE GLAND

To avoid hindrances caused by the LED cable during its use, we recommend you fasten it through the cable glands to the frame of your loupes. 

LED ADJUSTMENT

01.

ADJUSTING THE LED

We advise you to adjust the inclination of the LED headlight so that the light spot illuminates the field of view, acting on the joint of the LED headlight.

02.

FASTENING THE LIGHT ANGLE

Once the correct position has been established, we suggest you tighten the screw using the Allen key (included in the package).

UV FILTER

UV FILTER
FASTENING

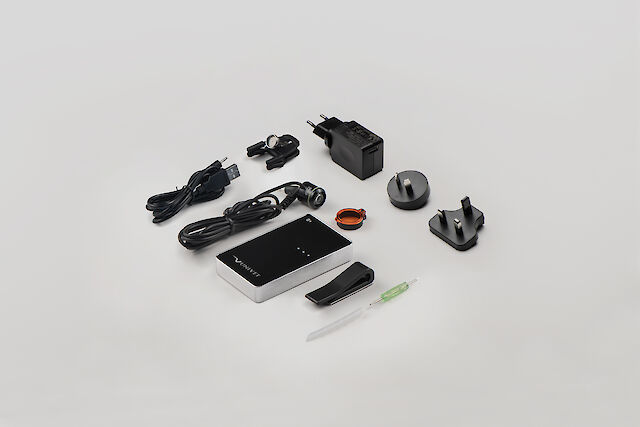
With a light pressure fasten the UV filter (included in the package) on the front of the LED headlight.

CAUTION
 

We recommend you do not use the lit LED device when it is not fastened to the loupes to avoid the risk of being dazzled.